Foursquare Atlantic District

Live Translation

How to broadcast your service

A step-by-step guide for the media team. Everything you need for Sunday is on this one page — plus how your congregation listens on their phones.

Takes about 2 minutes to set up  ·  No software to install

If your streaming setup is already working, you're already done.

Just open our page on the same computer and pick the same audio input you already use. Nothing to install, no cables, no new setup.

Part 1 · Media team

Start here: which one is you?

Find yourself in one of these two boxes, then skip the other one.

Option A

You already stream your service

You use OBS, vMix, YouTube, Facebook Live, or anything similar.

  1. Use the same computer that runs your stream.
  2. Open our page in Chrome, in a new tab.
  3. In the input list, pick the same audio device you already use for the stream.

That's it. Your computer already hears the service, so our page can hear it too. Nothing to install and nothing to change in OBS or vMix.

Option B

You don't have anything set up yet

No streaming computer, no capture — just the sound board.

  1. Run a cable from your sound board to a laptop using a USB audio connection. Many boards have a USB port built in; if yours doesn't, a small USB audio interface works.
  2. Plug it into the laptop and let the laptop recognize it.
  3. Open our page and pick that USB device in the input list.

Same test either way: the level bar has to move when someone speaks into a microphone.

Open the broadcast page

On the computer that has the service audio, open Google Chrome and go to:

Broadcast page — media team onlyfoursquare.innovaflow.app/broadcast
Type the address exactly as shown

Don't add anything after /broadcast. That address already connects to the correct room for the Atlantic District. If you add extra words to the address, you'll create a different room and no one will hear you.

Chrome will ask to use your microphone — tap "Allow"

This is normal. The page needs that permission to see your audio inputs. If you accidentally tapped "Block," click the small icon on the left side of the address bar, switch the microphone to Allow, and reload the page.

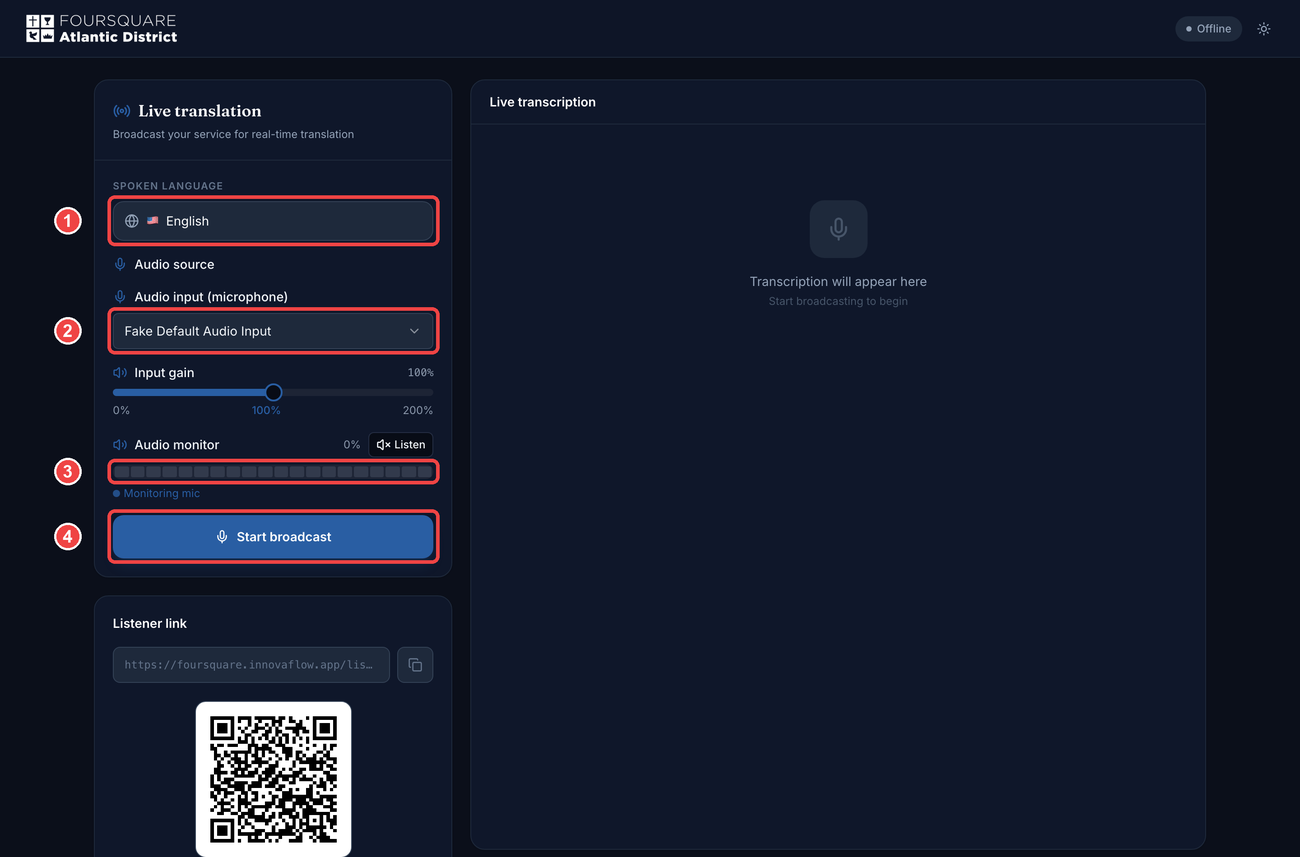
The broadcast page with the four controls marked 1 to 4

The whole screen. Everything you touch is in the left column: 1 spoken language, 2 audio input, 3 level bar, 4 the Start button. The big area on the right fills in with the live transcription once you begin.

The five steps

1

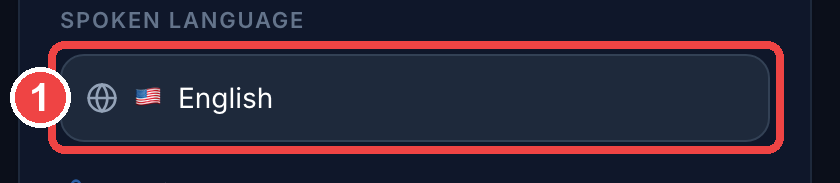
Set the spoken language

This is the language being preached — not the language people want to hear.

Click the box under SPOKEN LANGUAGE and choose the language the pastor is speaking. You can type in the search box to find it fast.

The spoken language selector, circled in red

Important: if the sermon is in Portuguese, set this to Português. If it's in English, leave it on English. Getting this wrong is the one setting that breaks the translation for everybody.

2

Pick the audio input

This is the only step that really matters. Take your time here.

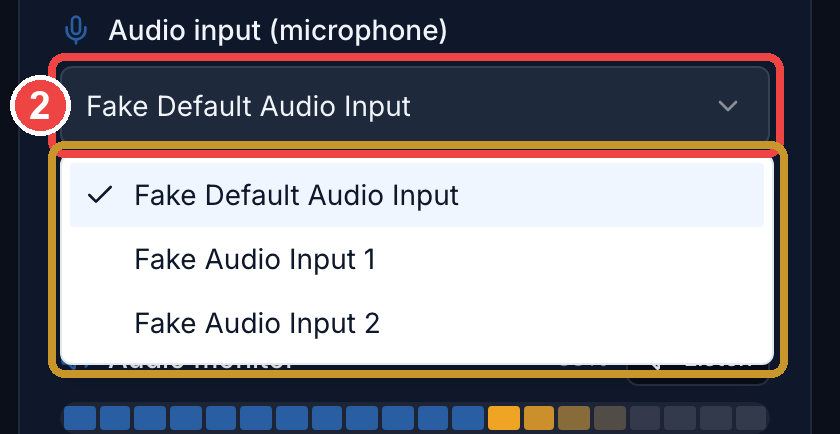
Click the dropdown under Audio input (microphone). A list of every audio device on that computer drops down.

The audio input dropdown open, showing the list of devices

Your list will show your own device names — your USB interface, your sound board, your mixer. The names in this picture are just placeholders from our test computer.

  • Option A (you already stream): pick the same device your streaming software is already using.
  • Option B (USB from the board): pick the USB device you just plugged in. It usually has the brand name in it, like "USB Audio CODEC."
  • Not sure? Pick one, do the test in step 3, and if the bar doesn't move, come back and pick the next one.
3

Test it — the bar has to move

Have someone talk into a microphone and watch the bar.

Right under the input list there's a row called Audio monitor with a row of small blocks. When somebody speaks into a live microphone, those blocks light up and bounce with the voice.

The audio monitor level bar lighting up

Blocks bouncing = you picked the right input. Blocks flat and dark = wrong input, or that channel isn't live on the board. Go back to step 2 and pick a different device.

How loud should it be?

During normal preaching, the blocks should reach about halfway across and stay blue. If they slam all the way into the red end constantly, turn the level down a bit on your board — or slide Input gain below 100%. If they barely move, raise Input gain above 100%.

4

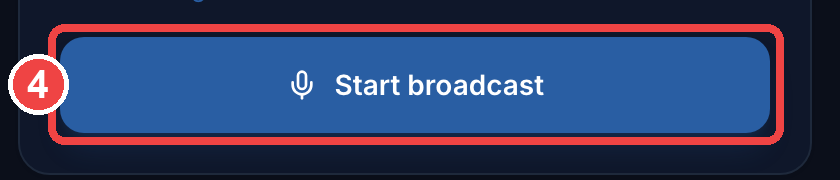
Click "Start broadcast"

Do this right before the service begins.

The blue Start broadcast button

The button says Connecting… for a few seconds, then turns red and reads Stop broadcast. That's how you know you're live.

5

Confirm you're on the air

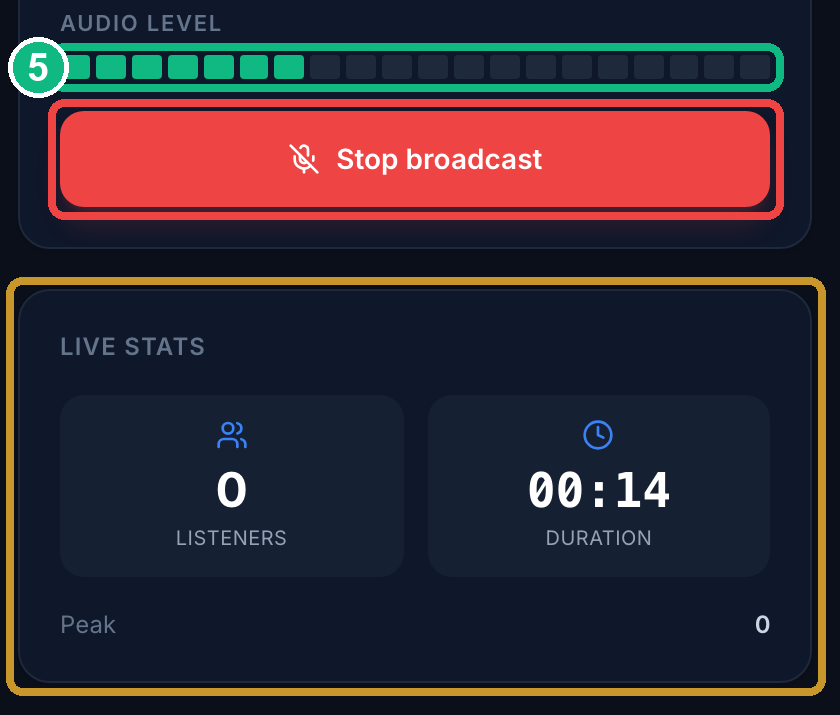
Four things on screen tell you it's working.

The live screen: green audio level, red stop button, live stats
  • AUDIO LEVEL turns green and moves with the preacher's voice. This is the one to keep an eye on all service.
  • The button is red and says Stop broadcast.
  • LIVE STATS appears, and the DURATION timer counts up.
  • Top-right corner of the page says Online, and words start appearing under Live transcription on the right.
Then just leave it alone

Keep the tab open and the computer awake for the whole service. When the service ends, click Stop broadcast.

Don't close the tab and don't let the computer sleep

Closing the tab or letting the laptop go to sleep ends the broadcast for everyone. You can use other tabs — just don't close this one.

Five minutes before the service

Run through this every Sunday. It takes two minutes and catches almost everything.

If something goes wrong

What you seeWhat to do
The level bar never movesWrong input. Go back to the Audio input list and try the next device down. Also check that the channel is actually up and unmuted on the sound board.
Chrome never asked about the microphone, and the list is emptyClick the small icon at the left end of the address bar, set Microphone to Allow, then reload the page.
The bar moves but listeners hear nothingCheck that the button is red (you actually clicked Start), and that the address is exactly /broadcast with nothing added.
Translation is in the wrong languageStop the broadcast, fix SPOKEN LANGUAGE to the language being preached, and start again.
You closed the tab by accidentOpen the page again, re-select the input, and click Start broadcast. Listeners reconnect on their own — they don't have to do anything.
The internet dropped for a momentThe page reconnects by itself. If the top-right corner still says Offline after a minute, click Stop, then Start again.
The sound is distorted or cracklyThe input is too hot. Lower it on the board, or drag Input gain down until the blocks stop hitting the red end.
People say the translation is very quietTell them to raise the volume slider at the bottom of their own listening screen, and to use headphones.
Part 2 · The congregation

How people listen

Nothing to download and no account to create. Two ways in — a QR code or a link.

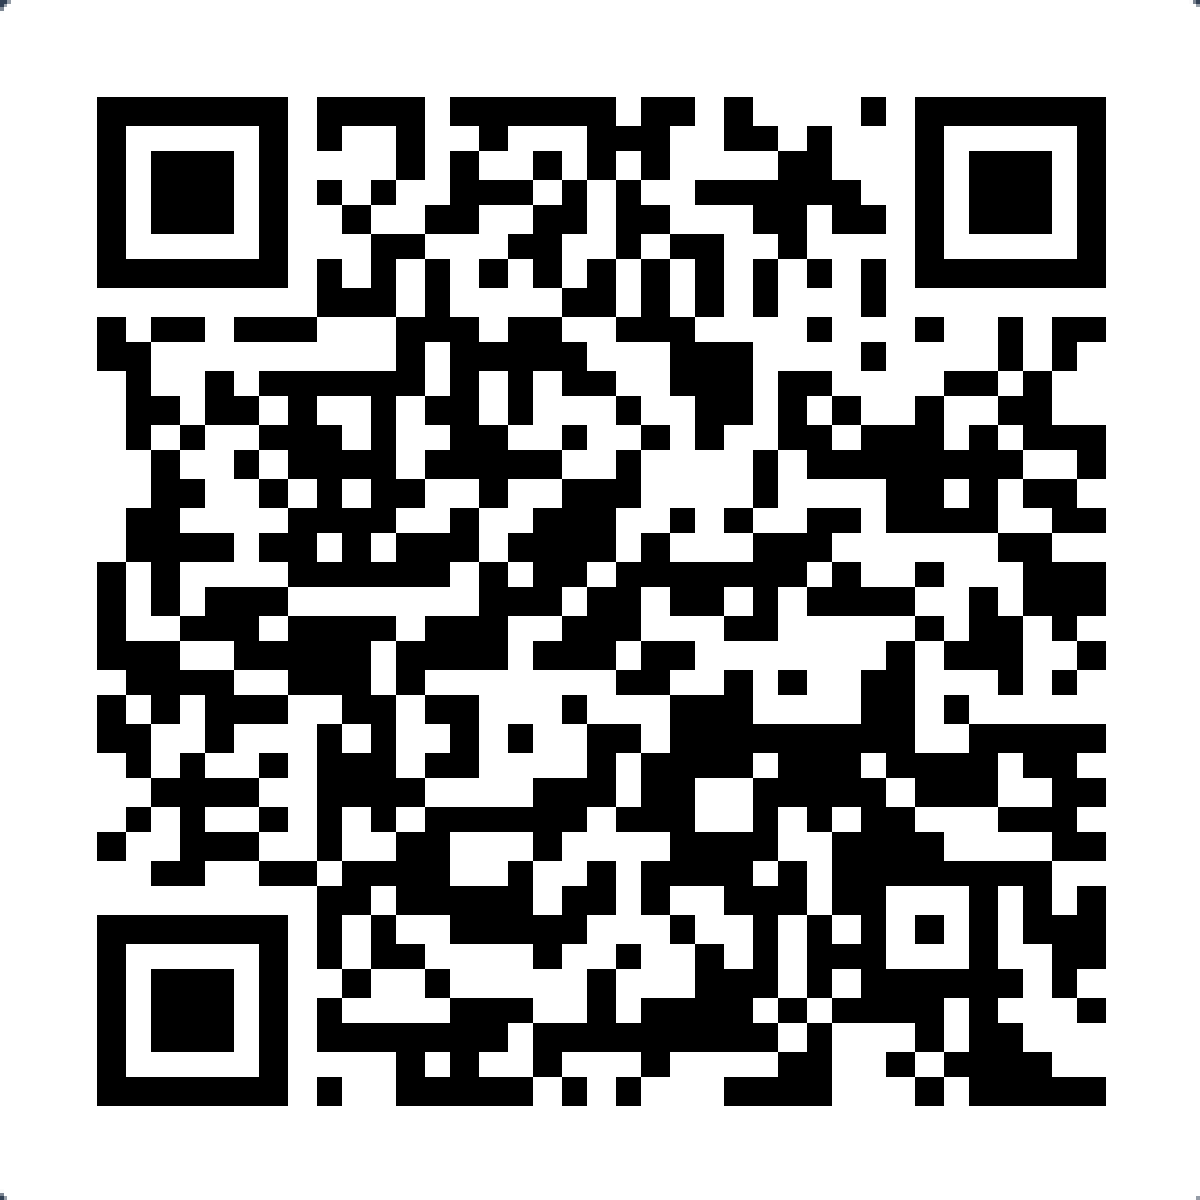
QR code to listen to the live translation

Point your phone camera here

foursquare.innovaflow.app/listen/foursquare-atlantic-district

This is the same QR code the broadcast page shows on screen while you're live, so you can also project it or print it on a handout. Both ways lead to the same place.

What people do, in three taps

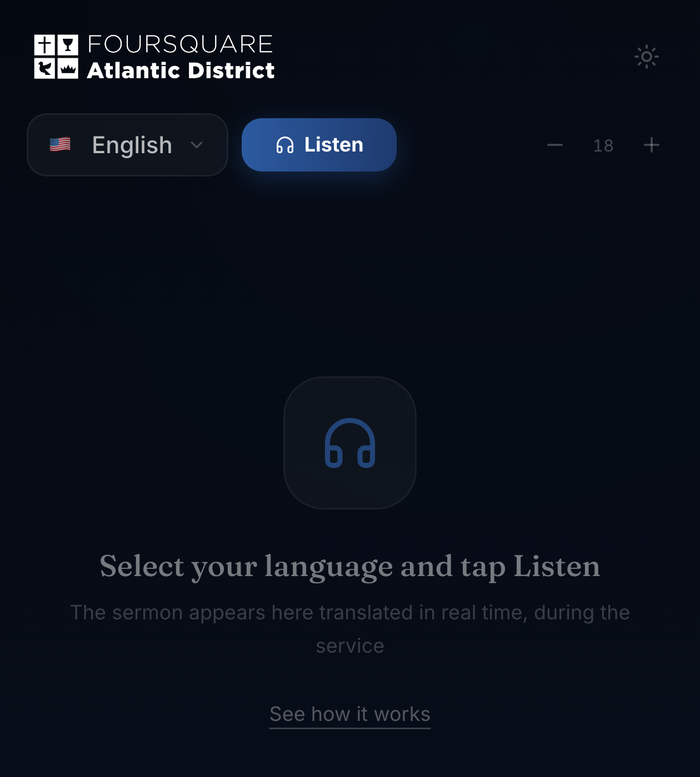
The listening screen on a phone

1. Scan the QR code, or open the link. The page opens right up — no app, no sign-in.

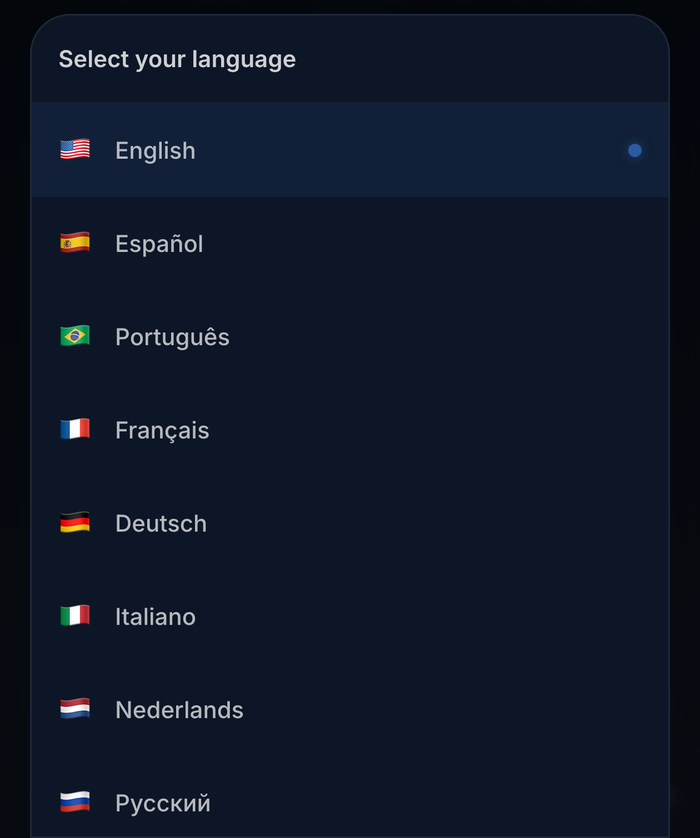
The language list on a phone

2. Tap the language button at the top and pick the language they want to hear.

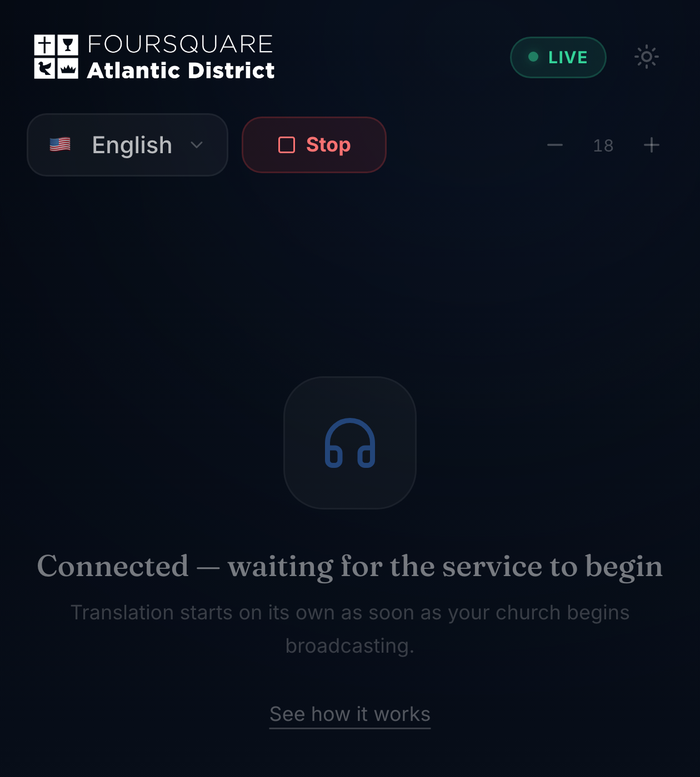
Connected, waiting for the service to begin

3. Tap Listen. The translation starts as soon as the service is on the air.

Headphones, please

Ask people to use earbuds or headphones. Without them, the translated voice plays out loud and everyone around them hears it during the service.

A few more things worth knowing